Let's get ready for Easter!
My mom took me to visit this lady (whose name I can't for the life of me recall) when I was 10. We lived in Dothan, Alabama preciously called "LA". Mom always admired "crafty" people and since I showed a real strong interest in crafts at an early age she would always take me places or to visit people that she knew would enthrall me. This lady really did! She did Egg Art.
My mom took me to visit this lady (whose name I can't for the life of me recall) when I was 10. We lived in Dothan, Alabama preciously called "LA". Mom always admired "crafty" people and since I showed a real strong interest in crafts at an early age she would always take me places or to visit people that she knew would enthrall me. This lady really did! She did Egg Art.
So,,,,about 12 years ago I was doing some scrap booking. Wait, let me digress....I love to play tennis. As a matter of fact at that time I was playing about 5 days a week. Anyway, I was sittin there scrap booking and "W" yells "KENDALL! There's a big dog in our back yard and he's gettin Moby" (of course "W" yelled for ME to fight off the dog....I mean what man wouldn't) and I go runnin outta the house and caught BIG time my pinky toe on the door. Ouch. Now. when I say it was sticking out at a 90 degree angle, I ain't lying folks. It was bad,,,real bad...um (still managed to get the dog though). Hobbled into the bathroom where W was and he almost threw up, I was about to pass out. He took me to the emergency room where the doctor almost passed out. (I'm just dead serious,,,it was that bad).
Why the heck am I telling you this at 4 a.m.?
Well, back to the eggs. I couldn't play tennis for 8 weeks so I decided to try my hand at those beautiful eggs that I remembered the crafty lady making. So, I made egg art, and more egg art, and more, and more......144 eggs to be exact. yep. 144. I really can't believe I didn't get salmonella.
So, since I'm outta blogging material, AND mom is still the same I thought I'd show you how to get you going for Easter. I've actually blogged about this before so, I'm recycling my blog. OH NO!!!
Here we go!
One of my favorites!
One of my favorites!

Start with blowing out some eggs...and clean them really well

you will need this: (matte) (and some tissue)


you will need this: (matte) (and some tissue)

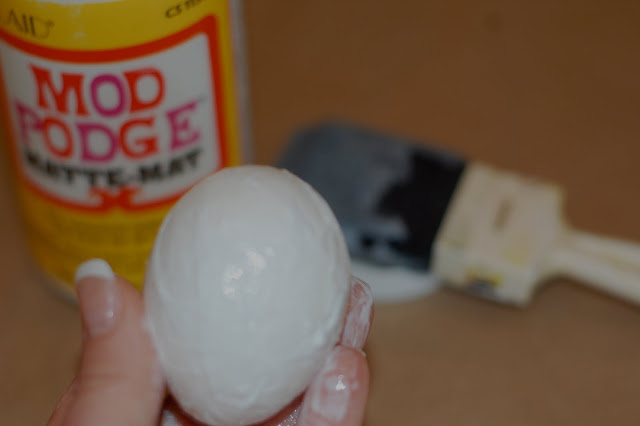
and some other stuff. This egg is going to be a chick

coat the blown out egg with mod podge

and cover in tissue smoothing out the wrinkles

you'll also need one of these...

once the tissue covered egg is dry get a pair of your best embroidery scissors (if you're lazy like me, just so you can ruin them) and poke a hole in the side of the egg)


then cut following the curve of the egg


Dry (and sanitize) the inside of the egg. Then paint


I painted the outside of this one cream,

and then glazed it with an umber glaze. With the tissue not being smooth it gives a beautiful crinkled painted finish

and then glazed it with an umber glaze. With the tissue not being smooth it gives a beautiful crinkled painted finish

then you take your trusty HOT glue gun and glue some grass in there.

and stick a chick! (and glue him too)

Then glue some trim around the cut out section of the egg. Careful not to burn yourself with that hot glue gun.....it will leave a scar for you to remember....

Now glue a ribbon around the egg

Now glue a ribbon around the egg
 and make a hanger
there ya have it!!! Egg Art,,,start working on these for Easter!

And here's some more....with a handmade Easter hat! (I was gettin really obsessive at this point)

and more

and more...


There ya have it folks!
These are also wonderful little gifts!
Now.....
I'm at the point where I'm remembering all the special little things Mom did for me. Taking me to meet someone who made an impression on my creative side was one of them.
Please pray for patience.
This is really wearing on us.
Have a wonderful Friday y'all!
kb
How precious & detailed those little eggs are!
ReplyDeleteWhat a neat thing to learn how to do!
Keeping your family in my prayers!
oh dear Kendall...I just pressed a button and deleted my comment: ( Really just needed to tell you love and prayers are constant for you and your family:) you are doing GREAT!!!
ReplyDelete